 Lisa Thompson
Author Archives: Lisa Thompson
 Lisa Thompson
Author Archives: Lisa Thompson
Doing everything possible to stop a dog from becoming aggressive toward cats requires training – particularly if the animal possesses strong prey instincts.
Chasing can lead to dangerous encounters between dogs and cats, and injuries. Chasing can be stopped through obedience training; redirecting their attention may also help diminish their natural desire to chase cats.
Dogs become aggressive towards cats due to excessive excitement, possessiveness or territoriality; this may seem hopeless at first; however, with proper training it is possible to address this problem with consistency and training methods such as keeping them physically and mentally exercised while training them basic commands like “stay” or “leave it. Training these basic commands may help mitigate aggression.
Playtime should be short between pets. Dogs often see cats as prey and become overly rough during play, potentially frightening or hurting them. If your pet chases after the cat or grabs at it, stop that interaction immediately and redirect their focus onto something else (a toy perhaps?) until eventually, they associate being around cats with positive associations rather than reacting negatively.
Rather than attempt to train your dog yourself, consider hiring the services of an animal behaviorist or canine trainer to guide the process of safely introducing both animals in a controlled setting while teaching basic obedience commands that will prevent them from becoming overexcited or territorial towards each other. Furthermore, ensure your pup remains on a leash at all times near a cat.
Punitive measures should never be employed when trying to stop your dog from being aggressive towards cats; corrective behavior like firm “No!”s and confinement to an isolated area may help deter unwanted behaviors more successfully than physical punishment will. Be warned; hitting your pet will only increase its distaste for cats further.
If your dog becomes aggressive toward neighboring cats, it is important to inform the neighbors and alert them of this development. Unfortunately, dogs do not always mesh well with cats, and may pose serious danger. This is particularly true with larger breeds; even playful and social animals may cause severe injuries when playing too roughly with timid felines.
Some dogs possess an instinctual desire to hunt cats. They might view cats as prey or competitors for resources such as food, toys and litter; this could result in aggressive behavior from some dogs if their focus becomes exclusively focused on hunting cats; training techniques may help address such instances of aggression.
Obedience training for dogs can be essential when teaching your pet how to behave around other animals, including cats. Teach basic commands like “sit” and “look at me”, then practice these during walks near felines while following these instructions. Reward good behavior by offering treats or praise when your pup obeys, which will reinforce those commands while showing your pup that cats do not pose any threat.
Training your dog not to chase cats is also key. When your pup begins chasing after an animal, interrupt their pursuit with a blast of water from a bottle or spray bottle filled with warm rather than cold water – this should prevent shocking your canine friend. Repeat this technique several times until he or she stops chasing after cats altogether and becomes calm around these animals.
If your dogs are still showing aggressive tendencies, separate them. Pay attention for early warning signs such as growling, stiff body posture or still eye glares which indicate their impending aggression; give your pup time to relax for several minutes before trying again.
Bear in mind that even the calmest and well-adjusted canines may react aggressively if they feel threatened or injured, and quick intervention could prevent serious problems which could end in cat attacks or killing. If your aggressive dog becomes dangerous around cats and other pets, consult a professional trainer on how to retrain it safely – the process may be slower, but is certainly preferable than dealing with injured felines or canines!

Step one in developing a positive cat-dog relationship is giving each pet their own space. A room featuring the cat’s litter box, food, and water would be ideal; even a tall baby gate or door may suffice. This space gives the cat space from any potential threats from dogs as well as giving them something positive associations such as food.
Before introducing two pets together, it is crucial that they get acquainted with one another’s scents before meeting face to face. You can do this by feeding each animal separately on opposite sides of a gate or swapping blankets and having them spend time in each others rooms. You could also try conducting short and positive interactions in one room using leashes – keeping their interactions short but positive!
At first, observe each cat’s body language carefully during early interactions. If they show any sign of distress such as swishing their tail or ears flattened against their head or turned sideways, raised hair on their back, crouching or slinking away, it indicates they may not yet be ready to meet. Conversely, when their behavior shows more positive signals such as ignoring each other or sniffing each other through a baby gate it could signal readiness to proceed further with introductions.
Once both dogs have been introduced to each other a few times, it’s time to begin LAT (Limited-Area Testing). Have someone enter the room while still holding your pup on leash, then approach her room while approaching cat. If aggression arises between cats and dogs, use toy distraction or obedience commands as tools until he remains calm around cat.
Continue the above process until your dog can sniff or touch the cat without reacting negatively, this may take hours, days or weeks – each pet learns at their own pace! Once your pup can tolerate having cats around it will only require patience on your part!
Dogs that become aggressive toward cats are a serious hazard to both themselves and felines alike, leading to injuries on both sides. Therefore, it’s essential that owners teach their dog how to behave around felines through obedience training and positive reinforcement techniques – this may take some time before your pup relaxes around her cat – yet doing this is vital in order to prevent injury.
Some dogs become aggressive toward cats because they perceive them as predators or potential competition for resources, or as intrusions into their territory. Sometimes this aggression comes from past experience and it may be difficult to overcome it.
To reduce aggression from your dog towards cats, it is crucial that they be kept apart until they have undergone obedience training and learned how to relax around them. A gate or door may help do just this; just monitor how their interactions progress until the dog has become calm and nonaggressive.
If your dog begins to growl or bark at a cat, use a leash to redirect their attention away from it and redirect back. When they stop and obey as desired, give a treat as reinforcement of good behavior. If this does not work, put your pup in their crate until they can relax – don’t yell at them as this may escalate the situation further!
As soon as your dog and the cat can interact peacefully, then slowly introduce them together. Always supervise interactions closely and remove either party if there are signs of aggression; alternatively try using a natural cat pheromone diffuser in your home to help your pup feel more at ease around her feline counterpart.
Reuniting your cat and dog doesn’t happen overnight, but with patience and consistent obedience training it should become possible for them to live together peacefully. To achieve maximum results from this training it would be wise to hire a professional trainer.
Some dogs become so anxious when visiting the veterinarian for checkups, toenail trims or x-rays that they require sedation – often through trial-and-error to determine an ideal drug and dosage combination.
Sedatives help a dog relax and become sleepy without anaesthetic-related consciousness loss, but like all drugs they may cause side effects; some dogs may show signs of fatigue after taking them off the shelf.
Lavender, chamomile or peppermint oils may help calm a dog when used properly and can add an additional soothing method in your home to calm them such as soothing music or aromatherapy. When applying these essential oils directly onto your pup, please consult a vet as to their suitability for use on him/her.
In extreme anxiety cases, medication may be required. Acepromazine is the most frequently recommended sedative by veterinarians and works by altering neurotransmitters in your pet’s brain to soothe them and ease fear. Other sedatives available upon prescription only include Telazol anti-anxiety drug Telazol muscle relaxant diazepam pain reliever butorphanol; your vet will determine the proper dosage according to their weight.
Medication sedation for dogs should only be recommended once other calming techniques have been tried and exhausted. Administering medication without consulting your veterinarian’s advice is risky and too much sedative may render your pup unconscious. After administering their sedative, your dog will require time to recover; one of these soft and cozy beds is an ideal place for them while this happens.
As part of any sedative treatment plan, it’s also essential that your pet does not eat for 12-14 hours prior to receiving medication, as this could alter its effects. If you need assistance in prepping your pup at home for their sedative dose, ask your veterinarian to recommend Zylkene or Adaptil; both contain milk proteins with natural calming effects and should help your canine stay relaxed during their experience. You could also join group dog obedience classes so that they become more socialized with people and other canines alike!
Aromatherapy is an increasingly popular way to ease dog anxiety during grooming or other stressful events. Essential oils, which contain highly concentrated plant extracts, can be mixed in neutral bases with water to create pleasant aromas which are then diffused into the environment for spraying or diffusing, creating an inviting fragrance in any space they enter. Different oils offer various therapeutic benefits like relaxation, decreasing anxiety/stress levels or alleviating depression symptoms; you can purchase aromatherapy products pre-mixed at pet stores or online.
Lavender oil is widely considered one of the best ways to relax a dog, but other oils may also provide relief. A few drops of neroli can be used to induce sleep while orange blossom and ylang-ylang help ease anxiety while orange blossom and ylang-ylang are excellent at relieving tension and stress. Chamomile, valerian and passionflower can also provide natural options that reduce anxiety during grooming sessions while herbal supplements come in capsule form as well as tea bags or treats; Bach flower remedies offer another non-toxic solution that can be dropped directly onto their tongue!
Natural methods may help your dog relax during grooming sessions; however, in some cases medication will be necessary. Oral sedatives are the most frequently prescribed – although their side effects could include vomiting. Utilizing prescription sedatives requires consultation with a veterinarian, and always provide your dog with an escape route in case they begin to panic at any stage during nail trimming or other potentially distressful events. Benadryl and melatonin supplements may serve as mild sedatives that help your pup remain calm during nail trimming sessions. Although not meant to replace prescription medication, these over-the-counter products can help your dog remain relaxed throughout their grooming session and may prevent biting too hard or scratching at their groomer.
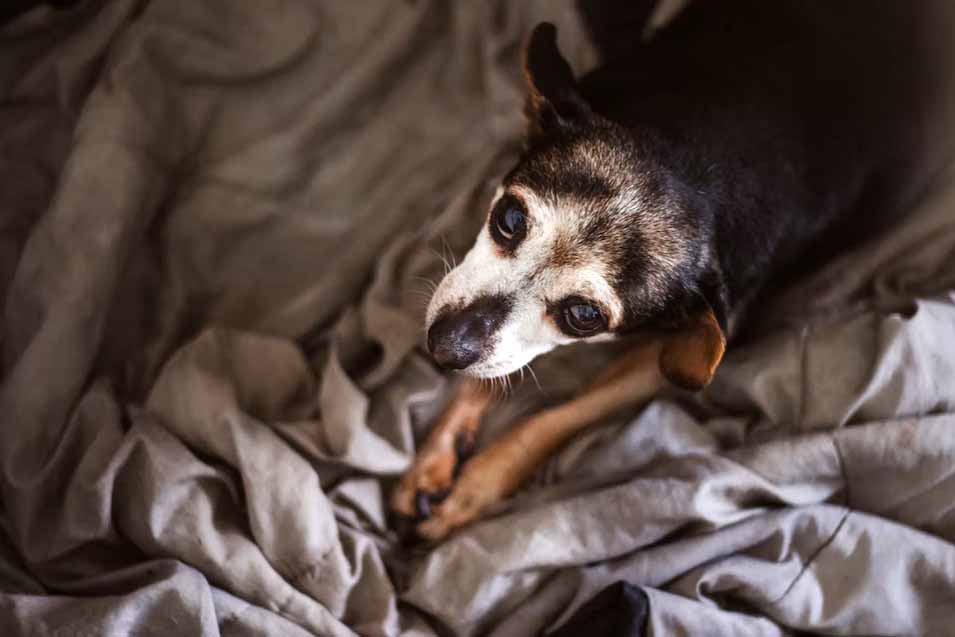
When dogs become nervous, their behavior may vary significantly. Sometimes their anxiety stems from an underlying medical issue which can be treated once under control; other times it could be something like noise sensitivity which can be managed with FDA-approved products like Sileo and Maropitant.
Sedatives are drugs designed to make dogs relaxed and sleepy, usually through oral or injectable administration. Vets typically recommend trying different forms and dosages until finding what best meets each pet’s individual needs; vets will typically administer sedatives during medical procedures that require stillness, such as x-rays, MRIs or CT scans; they may also use them during ear cleanings, fur clipping or nail trims which could otherwise cause anxiety for anxious or reactive pets.
Dogs that receive sedatives for grooming or medical procedures can suffer side effects when given these drugs, including difficulty maintaining its body temperature as it relaxes during grooming or medical procedures – potentially leading to hypothermia which is very serious in dogs; thus it’s essential that you monitor your pup carefully prior and post sedation for safety purposes.
There are natural ways to help ease your dog’s anxiety, such as aromatherapy, music and light therapy. Before opting for natural sedatives or synthetic ones which could pose potentially harmful side effects, try these natural approaches first – aromatherapy, music and light therapy can provide insight into what may be triggering his anxiety and then take steps to treat its source if applicable – these methods could provide vital clues as to where your pup’s anxiety stems from and preventing recurrence – this should save on time spent administering natural or synthetic sedatives which could potentially contain potentially dangerous side effects!
All mammals are attuned to auditory cues and react in various ways when hearing loud and sudden sounds that stimulate adrenaline and raise heart rates, while soft repetitive sounds such as those found on CDs like Through a Dog’s Ear can help pets relax during nail trims.
Music can also serve as an effective natural sedative and may even outshone traditional drugs in certain circumstances, for instance when dealing with highly reactive dogs such as thunder and fireworks, who respond better to music than pharmaceutical drugs like Valium or Melatonin.
On 31 October 2019, a literature search was conducted of scientific journals that contained the keywords “music therapy” and “canine”. Our search included articles which experimentally modified auditory environments or assessed at least one measure of canine health and behavior.
Research has demonstrated the efficacy of relaxing classical, reggae and soft rock music on canines’ nervous systems. Music with pure tones may have more of an calming impact than those featuring staccato (short repeated notes), which tends to stimulate. Furthermore, its tempo should correspond with their resting heart rate or respiration rate for maximum effectiveness.
No matter whether a dog is anxious due to noise sensitivity, pain or fear of nail clippers, massage is an excellent way to ease their nerves and make them more relaxed. Before massaging your pup, ensure they’re in an submissive and relaxed state (ideally lying down). Chamomile tea, skullcap or catnip can all help soothe their nervous systems before beginning massaging sessions; alternatively apply topical analgesics like Sileo or Adaptil before massage for added effectiveness.
Massage not only relaxes animals but can also strengthen relationships between pet owners and their animals, benefitting both physically and psychological health. Massage increases circulation, enhances flexibility, encourages lymphatic fluid movement, lowers blood pressure, stimulates immune systems and digestion systems as well as identify any lumps or bumps present on pets that might need additional medical care. Regular dog massage sessions also can identify potential issues like lumps and bumps before they worsen over time.
Massage therapy can also help ease medical conditions like osteoarthritis and joint pain, as well as muscular-skeletal conditions like sprains and strains. Massage can even be used to treat autoimmune disorders like laryngeal paralysis which occurs due to spasms in throat muscles causing difficulty in breathing.
Starting off a massage should start off right with effleurage – long gliding strokes applied lightly across muscles using light pressure. After several minutes have passed, move onto other parts of the animal’s body such as ears, tail, legs or paws until relaxation sets in. If this method doesn’t seem relaxing enough for them, deeper tissue massage techniques such as deep tissue, tummy rub or trigger point may be more appropriate; no matter which technique is chosen initially keep sessions short until your animal adapts to what this new experience.
Newborn kittens that become orphaned may quickly begin to die if left alone, so if any signs emerge that a kitten may be in distress, act swiftly.
As soon as you bring home a kitten, the first step should be to warm them up. A heating pad or hot water bottle set on low can do just fine; just remember to leave enough breathing room so the kitten can breathe freely while wrapped up in its towel – don’t cover its head too closely otherwise breathing difficulties might occur.
If your kitten appears sick, the first thing to do is take its temperature. A normal cat temperature falls between 100-102.5F/98-103C; any temperatures lower than this may constitute an emergency situation requiring immediate medical intervention.
After purchasing a digital thermometer and applying petroleum jelly or another lubricant to its tip, place the thermometer into your kitten’s ear canal. Be careful to hold them very still during this process or seek assistance from friends to ensure the kitten does not move or become distressed by having someone watch over them while taking measurements. When you receive your temperature readings, record whether they fall below or above normal before scheduling an appointment with your veterinarian.
While you wait for your appointment, keep an eye on your kitty’s vital signs such as heart rate and breathing. In most cases, blood tests, X-rays and other diagnostic tools will be conducted in order to identify what caused their low body temperature; depending on this diagnosis your veterinarian may suggest fluid therapy, dextrose to support blood sugar levels as well as nutritional supplements like Karo corn syrup that contain electrolytes as treatments options.
Keep in mind that mortality among kittens under nine weeks is very high, meaning one or two kittens in every litter will perish before reaching adulthood. Though it can be heartbreaking, animal experts consider this behavior normal.
However, if you can rescue an ill kitten before they become critically ill, its chances of full recovery are very good. This is especially true if they receive prompt and appropriate care from its owners or people familiar with cat health needs. Pet insurance early on is also highly recommended to provide peace of mind and manage unexpected vet bills, should any arise.
CPR (also called artificial respiration) is an invaluable lifesaving skill, providing vital time to reach a veterinarian and seek treatment. Foster or pet parents who care for kittens in distress should learn this vital lifesaving skill as it could save a kitten’s life.
Start by checking your kitten’s airway. If it is lying on its back, tilt it slightly so you can view its throat and mouth, using your fingers to gently sweep inside its mouth and dislodge any foreign objects that might be blocking its airway. If no such objects exist, move on to step 2.
Once the kitten’s airway is clear, begin giving rescue breaths by placing your hand over its nose and mouth and sealing it to blow gently on them. Although this may be difficult due to their smaller lungs than ours, just make sure the chest rises as much as possible while giving these rescue breaths for about one minute or until they start breathing on their own.
If a kitten is still not breathing, chest compressions should begin immediately. When placing it on its side, compress its chest approximately one inch with 80 to 100 compressions per minute; avoid leaning on them during this process as leaning on them may cause bleeding to reoccur.
CPR should always be performed by two people simultaneously on a kitten, with one person providing artificial respiration while the other gives chest compressions. Alternate between breaths and compressions until your kitten resumes breathing on its own. Wrapping your kitten in an old T-shirt or towel may keep it warm and comfortable during compressions and absorb any fluid leakage from their mouth, throat or lungs.
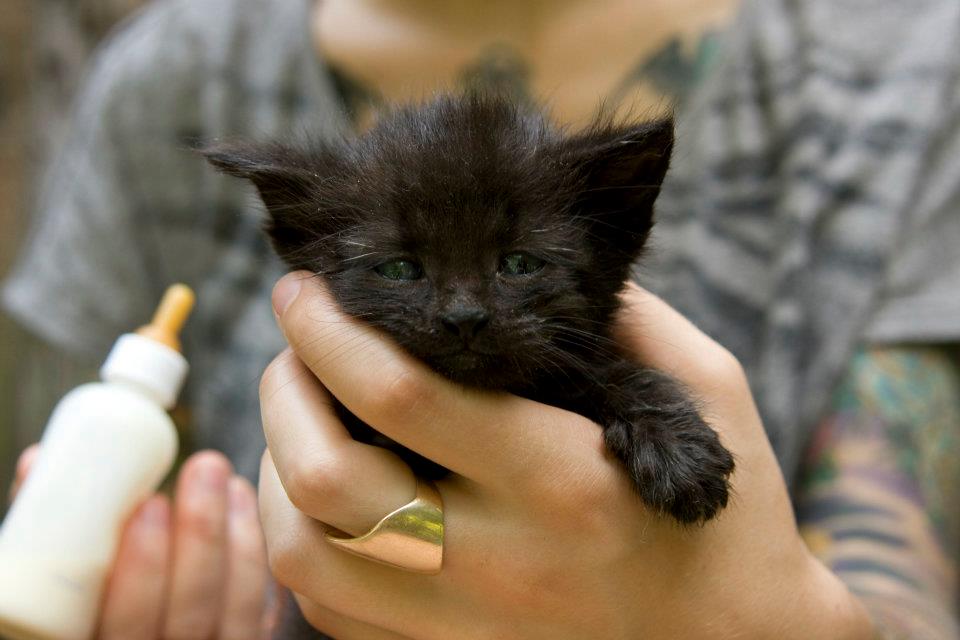
Under-skin injection of kitten fluids is one of the best ways you can help save a sick or dying feline, helping rehydrate them and ease their discomfort. While giving yourself fluid injections may seem simple, always consult a vet first before trying this yourself.
Neonatal (newborn) kittens can be particularly vulnerable to illness and may die soon after birth. With limited abilities for temperature regulation and immune systems that remain immature, neonatal kittens may be especially at risk of illness – lying separately from healthy kittens, being restless, not wanting to suckle on mother’s teat and crying being indicators that something may be amiss.
Kittens too sick to drink can be rehydrated with fluid bag and needle. It is critical that this action be taken quickly; otherwise the kitten could die of dehydration before reaching a veterinarian.
At first, hang the fluid bag 3 feet (1 meter) above your cat to easily access and administer its fluid set under its skin. Use a coat hanger, over-the-door clothes hanger or another similar device to hang the bag securely before bringing your cat over and laying him or her down on a flat surface so both of you are comfortable while administering fluids over 10-15 minutes.
Once the cap from the end of your fluid set has been removed, insert the needle under the skin of your kitten and slowly squeeze fluids from its bag into your kitten. When all of the fluid has been injected, take care to pinch or massage the injection site for one minute after pulling out the needle to reduce leakage around its edges; sometimes you will even witness small amounts of blood as soon as you withdraw the needle – this is totally normal!
Once your kitten has received all its fluids, carefully wrap it in a blanket or towel before placing it back into its incubator to return its body temperature back to normal. Make sure not to take your kitten out too often as this could cause it to overheat.
Kittens are fragile creatures prone to many illnesses that threaten their lives and need constant care to thrive. Caring for orphaned kittens can be both rewarding and demanding responsibilities; one such challenge lies in Fading Kitten Syndrome, or failing to thrive, often fatal among newborn animals. Regular visits to your vet, adequate care, and proper diet are the keys to prevent its occurrence.
If your kitten shows any sign of distress, it is crucial that immediate steps be taken. First and foremost, check that its temperature and heartbeat are normal; secondly give fluids; finally take your kitten immediately to a vet for care.
Before taking your kitten to a veterinarian, make sure it has become acquainted with its carrier. Do this as early as possible: leave the carrier open in your home and fill it with bedding that’s familiar to them, sprinkle some catnip in it for good measure, and provide pleasant experiences during travel time to and from vet. On arrival, carefully hold it while transporting to ensure maximum protection during journey time and prevent other cats from waiting in waiting areas of vet office.
As part of the visit, it is essential to inform the veterinarian about your kitten’s life history – this includes where it came from (such as an animal shelter or private home), its diet and any medications it has received. Completing a registration form early will save time in the office.
After seeing a vet, they will likely prescribe antibiotics to treat any infections present. Following that, the kitten must be kept in a warm and quiet environment without other animals nearby; an ideal clean environment will allow the kitten to recover completely from his or her infection.
If a normally well-behaved dog suddenly refuses to walk on leash, first inspect for signs of injuries such as thorns, bruises or cuts. If any are detected, have the animal seen by a veterinarian and allow for recovery before continuing training sessions.
Rescue dogs often feel intimidated when wearing leashes for the first time; therefore it is crucial that you teach them to become familiar with this feeling and how it affects them.
Owners who find their dog refusing to walk can become confused and distressed, so it is crucial that the root of the problem be identified so it can be effectively addressed. Possible sources may range from health issues to training issues or fearful reactions when encountering new environments; patience, positive reinforcement and calm approaches may help overcome such resistance or fearfulness.
If a dog has never been leash trained before, the sight, scent, and feel of collar and leash may be intimidating or frightening for older animals who have had negative experiences in unfamiliar settings. In these instances, spending some time at home giving your pup time to sniff at and familiarize with equipment as you reward with treats can help your canine associate them with positive associations while simultaneously preparing them for walking outside.
One reason a dog might refuse to walk on leash may be that they become overexcited at being contained by it and want to run ahead or explore. While this behavior is normal among canines, if left uncorrected it may make walking challenging.
An anxious or fearful dog on its first walk might become anxious at the sight of other dogs or people, which can be eased with positive reinforcement and firm leadership from its owner.
At times, a dog may simply be too exhausted or sick to enjoy being out on walks, which could be indicative of osteoarthritis, metabolic disease, undiagnosed diabetes or Lyme’s Disease – conditions which should be checked by a veterinarian immediately.
As it’s possible for dogs to become wary of certain objects or locations – such as their neighbors’ home, park or open field – this can easily be remedied by taking them there daily for outings, gradually expanding to larger areas as long as they remain calm and content during each outing. Doing this will allow them to become more comfortable with these surroundings while showing them they can go out with their owners without being scared or anxious.
If your pup is refusing to walk because they are fearful, take swift action. Many dogs become stressed over noises, trash cans, signs and even other dogs walking by; to combat this issue slowly walk past whatever source causes your fears in an safe area like your front yard and reward him/her with treats whenever they get within sight of what scares them – this will teach them not to fear it and increase confidence levels! This method may help them understand that what once scared them is actually harmless.
One reason a dog might refuse to walk on leash is they feel unsafe being restrained, particularly puppies or older dogs who are used to being free-roaming while walking. If your pup tries bucking or pulling away, try restricting any access that might distract him; this will force him/her back onto you while showing them that following will bring more rewards than exploring on their own.
Once your dog has become familiar with his collar and leash, take him or her outside for short walks. Start off slowly allowing your pup to sniff at everything then treat them while walking. Gradually extend each walk further away from home.
If after several weeks of training you are not seeing any progress with your pup’s leash walking issues, professional assistance might be required. An accredited dog trainer who uses positive reinforcement techniques could help your pooch overcome any challenges they are encountering on his journey towards becoming leash-walking pro!
A good dog trainer will also ensure your pup is free from pain or physical restrictions that might impede his or her walk ability, similar to what veterinarians can help you assess. Once these concerns have been taken care of, your trainer can teach your pup to accept collar and leash again by showing you how positive reinforcement can promote desired behaviors in them.
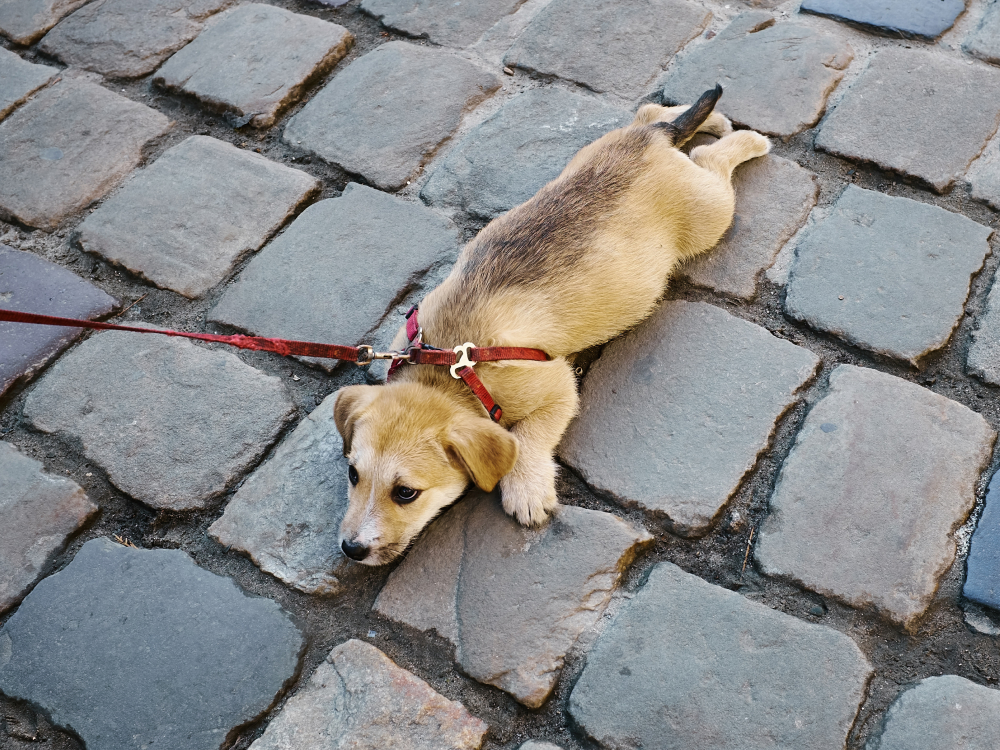
An essential component of most dogs’ lives, walks can be an indispensable activity. Unfortunately, however, some animals pull on the leash and refuse to walk beside you which makes walks challenging for both of you. This behavior could be the result of health concerns, fear or lack of training – however with patience and the appropriate tools most dogs can be taught how to walk politely on leashes.
Some dogs become overwhelmed when confronted by the sight, scent and feel of collars and leashes; this can result in them becoming overexcited, pulling and ignoring commands. To address this situation safely and humanely, let your pup become acquainted with these elements gradually over time – for instance by having him wear the collar when eating or playing with toys – then gradually extend this period over time. You could also try having him carry their toy while walking around your home until he feels secure enough with them and clip them onto his collar when comfortable enough with its sensations.
Other dogs may need help learning to walk. In such instances, it is crucial that basic obedience commands such as “heel” be practiced before trying to teach him how to follow you while walking – say the word in a quiet place and have him follow your hand with treats just a few steps at a time until he can do this consistently without pulling at your arm.
If your dog pulls, stop the walk immediately and encourage him to come back by using positive verbal praise, treats, and gentle leash nudges to bring him back onto your side of the path. As soon as he does, reward him immediately and start walking again – repeat this process whenever your pup returns without pulling and gradually increase its distance over time.
Some dogs simply require more exercise than they’re getting, which may result in them being overly enthusiastic during walks and pulling against commands. To help your canine out in this instance, consider taking longer walks or enrolling him in a dog sport that burns energy while increasing focus and concentration.
Many owners rely on treats and positive reinforcement to teach their dogs basic obedience, but leash training a dog that refuses to walk may require more. If the animal is fearful or anxious when being led on a leash or has health concerns that cause discomfort when walking on it, training the animal without pulling may not be possible; in these instances the owner should address all underlying issues before trying to teach calm walking on leash.
For dogs that become distressed when being put into their collar and leash, it’s recommended that this behavior is addressed inside the home. Start by giving treats while your pup explores sniffing around the collar and leash, before eventually encouraging forward movement with increasing distance from home gradually.
Once your dog has reached an area they feel safe with, reward each step forward with a treat. This will teach your pup that walking behind you on a loose leash is fun! If they start pulling, simply stop moving until they put slack into their leash by looking back or approaching. Immediately reward and resume walking!
Additionally, you can help your dog overcome their fears by introducing them to strangers during walks and helping to build up their confidence by showing that other people are not scary. Another strategy would be using a shorter leash at a faster pace to reinforce that they need to follow you rather than lag behind or sniff at random points along the path.
If all else fails, consider hiring the services of a professional dog trainer. With their positive training techniques, an experienced trainer should quickly have your pup walking on a leash with you!
Animals requiring water for survival require drinking it regularly to stay hydrated; but what can you do if your cat won’t? Our Visalia veterinarians suggest several reasons why cats may not be drinking as well as quick at-home “tests”.
Just a few simple adjustments can help your cat regain her health. Below are a few ideas to hydrate her properly: 1. Switch Up Where The Water Bowl Is Stored.
All animals, including cats, need water for proper hydration. But encouraging cats to drink can sometimes be challenging when they’re not feeling it. Our Visalia veterinarians offer tips to keep your feline hydrated.
First and foremost, try moving their bowl to a quiet and calming area away from noisy machines and alpha animals in your home. Switch up their type of bowl; some cats prefer ceramic or glass bowls while some don’t care much for plastic. Switching up their type could alter taste of water and get them drinking again!
Increase the frequency with which you refill their bowl with fresh, inviting water; make an effort to do it daily for maximum effect. You might also try changing up the material of their bowl; different materials offer unique tastes, which could encourage them to drink more of what’s offered – some cats prefer certain ones over others! Alternatively, use a fountain-style water dish as this will tempt them with its continuous stream.
If your cat refuses to drink water despite these strategies, it’s advisable to consult a vet. They can perform tests to check for dehydration symptoms and provide care should dehydration become a risk.
All animals require water to remain hydrated, including cats. However, it’s important to remember that cats can be difficult to read as their internal workings may make them hard to interpret; signs of dehydration could include tiredness or loss of appetite so it may be best to consult a vet if any issues exist. Typically your cat will drink when thirsty so don’t panic if they seem to go without drinking regularly – simply make sure they’re getting adequate fluid intake via canned food and other sources such as wet treats etc.
Dehydration is an ongoing problem for cats. Not only can it result in serious health concerns such as kidney stones and urinary tract infections (UTIs), but it can also reduce organ function efficiency, poor skin condition and, for male cats, even urethral obstruction. If your cat refuses to drink water on his or her own, here are a few strategies you could try:
As soon as the bowl arrives, be sure to give it a good scrub to ensure its freshness and cleanliness – cats tend to avoid drinking water they think is dirty or contaminated, which might make it unattractive for consumption. Also try placing it somewhere other than nearby such as with their food bowl or litter box as this might make the cat think the water has become polluted with waste from these sources.
Add some flavour to your cat’s water by experimenting with adding ice cubes or low-sodium tuna juice or chicken broth, to see if that encourages drinking more frequently. Just be careful not to overdo it as too much flavor can actually dehydrate them instead!
Another effective strategy to encourage your cat to drink more water is giving them wet food as part of their regular kibble diet. Dry cat food only typically contains about 10% water while wet foods may contain up to 78%.
Add canned food to their dry kibble diet in order to ensure they receive adequate fluid intake, but be wary of signs of dental disease, as this could result in pain and decreased appetite for both of you.
Finally, try adding some clam juice to their water to see if that helps encourage them to drink more often. Clam juice provides essential hydration for cats with all its vitamins and minerals – just be wary not to overdo it as too much might overpower its taste!
If these techniques fail to solve your cat’s drinking issues, it is crucial that she visit her vet for an exam. Dehydration can have serious health implications; therefore it is best to be proactive about taking preventive steps as early as possible. Your vet will be able to uncover any reasons behind her refusal and prescribe any necessary treatments or medication that might help.
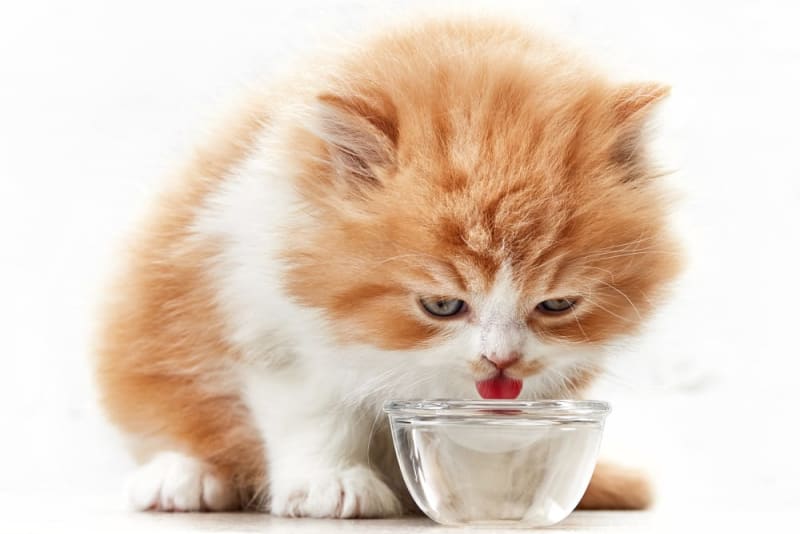
All animals, including humans, require adequate hydration in order to remain healthy, including cats. While cats tend to drink when thirsty, the amount of water necessary for ongoing health will depend on several factors including size, diet, exercise level and environment. If your cat doesn’t seem to be getting enough fluids it’s advisable to consult your veterinarian about whether they are okay; in the meantime here are a few tactics you could try in order to encourage more hydration from them.
Be sure to place your cat’s water bowls in peaceful settings away from other animals and noise, in order to give them peace of mind while they drink. Also try leaving multiple water bowls around the house at different locations so they have plenty of options when searching for new places to drink from. Also experiment with various types of bowls – some cats might prefer ceramic or glass versions which won’t taint their drink’s taste while some might prefer plastic versions that won’t affect how the taste comes through as much.
Add some flavour to your cat’s water to make it more appealing, such as low-sodium tuna juice, chicken broth or crushed catnip. Doing this may encourage more sipping from them!
If your cat seems lethargic or less active than usual, this could be an indicator that they’re dehydrated – this could be caused by dental disease, stomach issues or even stress – so if this is something you notice it is important to schedule an appointment with your veterinarian immediately.
However, while it is essential that your cat drinks enough water in order to stay hydrated, don’t panic if they seem disinterested in visiting their water bowl regularly. There are various techniques you can try in order to encourage more consumption – give these suggestions a go! If any additional queries arise please reach out!
Your cat may be reluctant to drink water for various reasons, including an underlying medical condition, poor bowl hygiene or external stresses such as houseguests or moving. But dehydration poses a significant health threat and should never be ignored!
As it isn’t rocket science, there are some simple steps you can take to encourage your cat to drink more water. Try leaving water bowls around the house where your cat likes to spend time, use different kinds of bowls (some cats prefer plastic while others don’t) and even adding some food items such as dry kibble. Studies have proven that adding food will increase appetites and lead to greater drinking behavior from cats and other pets.
An alternative cause may be that your cat has become dehydrated, which may indicate dental disease or pancreatitis affecting fluid intake; pancreatitis inflammatory bowel disease and cancers also increase fluid consumption and may make drinking difficult for cats.
To determine whether your cat is dehydrated, perform the Skin Tenting test. Gently pinch a small area between their shoulder blades and release. Their skin should spring back instantly if they’re properly hydrated; any delay could indicate they’ve lost too much fluid. You could also check their gum color; if their gums turn white after two seconds without returning back to pink color after pressing your finger onto them you should consider this as evidence that they’ve become dehydrated.
Finally, make drinking water fun for your pet by running the faucet and encouraging them to play with it. It will encourage them to drink more while providing an enjoyable bonding activity that provides energy boosts for energy needs.
Groomers understand that severe matting cannot be removed through brushing alone; their only safe option in such instances is to shave the dog.
Preventing matting in your dog is easy: simply brush them regularly, bathe regularly and keep their coat healthy and pristine. But what are you supposed to do if he or she ends up with an intense matted area?
Natural oils and a healthy coat help protect a pet against matting, but its hair may still become matted without regular grooming sessions. Some dogs are more prone to matting than others – particularly those that spend a lot of time outside, where burrs and debris collect in their fur. Mats may also form under front legs, behind ears, or at the base of tail.
Brushing regularly can often help avoid mats and knots for dogs when done on a daily or several times weekly basis, although large knots can form quickly if your pet is neglected in this department. If large knots do form quickly without prompt grooming sessions taking place quickly enough to remove them quickly enough, they can break loose from the skin, become painful for their host, and cause irritation of skin irritation as a result of too severe matting.
If the mats are tightly matted to the skin, brushing may not be possible and shave will need to be performed instead. While not preferred by groomers, shaving may provide the safest solution for your pup.
When grooming dogs with heavy matting, groomers will use clippers with short blades and sharp tips in order to avoid cutting into skin or damaging coat. A sharp blade makes cutting through matting much simpler. In some cases, de-matting tools that resemble combs may also be needed as these have sharp edges that cut through knots more effectively.
If the matting is so severe that it cannot be brushed out, it must be cut off using scissors or razor blade. While this process can be extremely traumatic for your pup, be assured that a groomer will use as much patience as possible during this procedure and recommend regular brushing sessions to prevent mats from reappearing in future visits. Be mindful that holding down or restraint may be necessary during grooming for safety purposes.
Once you’ve brushed away as much loose fur as possible, the next step should be using a detangler on your dog. Detangling products are designed to help tangles come out easily while they can also prevent matting from reoccurring between brushes. There are numerous brands of detangling products on the market; Skout’s Honor detangling spray is one that hydrates coat while providing probiotics which fight skin issues, itching, and odor.
Start from the tips of your dog’s fur, working up. Pay special attention when brushing sensitive areas such as its face, ears and base of tail which can quickly become knotted if not regularly brushed.
As you work your way through the mats, be patient and kind as you remove tangles. Repeated passes over one spot may be necessary in order to eradicate as many knots as possible. In severe matting cases where brushing and combing alone cannot remove them, your groomer will probably shave off some or all of it – this may not be preferred, but may be necessary in order to ensure both you and your pup remain safe from injury.
Hair that becomes matted on dogs can trap grass seeds, dirt and other debris that can lead to serious health issues and restrict movement. Your groomer will likely use a clipper with the shortest blade so there is less chance of cutting their skin accidentally.
Once the matting has been removed, your pet will require a bath with medicated shampoo to soothe their skin. They should also be dried carefully because their newly exposed itchy skin may lead to further scratching – leading to further damage.
As can be seen, matting removal can be a time consuming task that takes many hours of effort to complete successfully. Most groomers charge by the hour for this service. Therefore, to best address matting issue is by regularly brushing your pup and using detangler at least once every week.

Hair matts on dogs can be unbearably painful. While grooming severe matting may be tedious and time-consuming, it is necessary in order to save them from discomfort and potentially life-threatening skin conditions. I always advise owners of longhaired dogs to brush regularly as well as come in for regular full body trims to reduce matting incidence.
Professional detangling products and sprays may help to detangle mild matting; however, the longer a matt goes unchecked without being addressed quickly, the tighter and tighter it becomes, making detangle difficult.
If the matting becomes severe enough around ears and ear flaps or under legs and belly, it may be necessary to shave down to skin level – although not an ideal style choice for most pet owners – in order to ensure the health and safety of the dog.
Utilizing clippers equipped with short blades (please refer to our page on Dog Grooming Blades ), groomers are able to cut through matted hair safely separating it from the dog’s skin while taking great care not to cause injury or cut through their pet’s skin.
Trying to brush out or cut away severe matting from a dog with severe matting is often very risky, and can even endanger their welfare by mistaking where hair ends and skin begins. Therefore, owners are advised to sign a matted dog release form agreeing to have their animal groomed by someone experienced in handling matted animals and understanding all associated risks.
Overall, it may not be beneficial for long-haired dogs to have their fur completely shaved unless they are show dogs or competing in competitions; however, many owners enjoy the look of having their dog with shorter cuts at home; brushing and detangling between appointments will make matt management much simpler.
If your matting problem is mild, detangling sprays and tools may help. Although this process will likely cause your pet distress, it may still prove successful. If the matting occurs near neck areas or belly regions it could prove especially challenging; you may require professional grooming services instead.
Many dog groomers employ metal clippers designed specifically for dogs with sharp blades to trim out matting. This type of clipper can often salvage more hair length than brushing alone can do; however, in extreme cases where large areas of matting cover an animal’s coat it may be best to cut it all off instead.
It is the safest, and most effective option available to protect their pet from skin issues and discomfort. Though many pet parents cannot bear to see their pup this way, most will understand this is what’s best for their pup.
Some groomers will attempt to detangle severe matting with a detangling tool and comb, however this process often requires bathing the animal first in order to loosen and loosen any tight mats further – further complicating removal efforts.
If your client owns a long-haired breed that’s prone to matting, talk with them about the importance of brushing their dog regularly at home and setting up a maintenance schedule with you that includes regular visits for grooming at your grooming salon. Not only will this reduce matting, but it may also decrease full body clipping needs which may be less stressful on their pet.
Before bathing your pup, be sure to brush him or her and use only high quality shampoo. Bath water tends to set mats, making them harder to remove later on. If your pet does get matted again, prevent future matts by using detangling spray during brushing sessions, as well as having their coat clipped shorter in seasons where matting may occur.
As with dogs and cats, rabbits can also contract fleas that feed off blood from them to cause itchy skin conditions and spread disease to your companion animal. These pesky parasites can spread pain as well as disease to them as well.
Eliminating fleas on rabbits begins by providing your furry family member with a clean environment and regular grooming sessions. If this doesn’t do the trick, there are various safe and effective treatments available that could be of use to them.
Diatomaceous earth (DE) is a naturally occurring powder made up of microscopic remains from algae. Though gentle on human hands, this powder’s sharp microscopic edges can cut into pests like fleas. DE is safe for both rabbits and humans alike and can even be applied directly onto furry pets’ coats for effective flea management.
DE works quickly to cut away pest exoskeletons and expose their inner structures, leading them to lose moisture and dehydrate before eventually dying of dehydration. Because it’s highly absorbent, DE can absorb all of their body fluids. You can find food grade DE online or at stores selling supplements and treats for pets; just make sure that pool grade DE won’t irritate skin as this will only work temporaryy!
DE can be safely used indoors or outdoors and applied directly to carpets, furniture, bedding and any other areas where fleas could potentially hide. Carpets and furniture especially benefit from DE’s ability to reach into cracks and crevices where fleas hide. You can apply DE to your rabbit using either powder brush application or by simply spreading some over his entire coat – including ears and under his chin if applicable. Alternatively, spray him with 5 percent carbaryl insecticide recommended by Sacramento House Rabbit Society as another option.
An alternative method of eliminating fleas on your rabbit is with a special flea comb designed specifically for pets, which is gentle on fur and can help catch young fleas while they’re still hatching. After each pass through their fur, dip it lightly soapy water after each use so as to kill any eggs or larvae caught by it between passes – be sure to clean this frequently between passes in order to maintain maximum effectiveness!
Try applying dry DE powder directly onto your bunny’s fur. The abrasive texture can damage the soft outer shell of a flea, cutting into its flesh and killing it instantly. However, this method is less than effective at eliminating adult fleas so other methods should also be utilized in tandem.
People typically think of flea treatments in terms of dogs and cats; however, rabbits must also be protected from these pesky parasites. A simple flea comb may be enough to treat an infestation in small animals without resorting to chemicals – something many owners can easily do themselves right at home! If flea problems do arise however, be sure only use medicines approved specifically for rabbits by consulting your vet and following his or her instructions carefully.
Rabbits may contract fleas from other animals or from living in households where previously infested pets lived, as well as from visiting yards or veterinarian’s offices that are covered with fleas. Once infected with fleas, rabbits can spread them quickly among themselves and other furry family members in the home.
Fleas are constantly laying eggs. Once these hatch, their larvae – similar to caterpillars – feed off of organic debris in your home before spinning a cocoon for development into adult fleas that live for months in warm and damp places like carpet fibers, cracks in floors or soft furnishings like cushions.
Adult fleas that have recently emerged seek out hosts that will allow them to begin their lifecycle again by biting and laying more eggs, leading to rapid population explosion.
If your rabbit does have an extreme flea problem, you can use a specially-made flea comb to quickly and effectively eliminate adults and eggs. A great comb would contain fine teeth specially made to extract fleas; you can find one at your local pet store or online. Each time before using it on your rabbit’s body – especially behind their ears – use warm soapy water or alcohol-soaked cotton pads dipped into warm soapy water or alcohol for this task to drown and ease flea removal. Be sure to comb all areas thoroughly including behind its ears where possible dunk them in warm soapy water or alcohol beforehand in order to drown fleas more easily remove them all!

If you notice itchy spots on your rabbit’s skin or small red marks resembling mosquito bites, these could be fleas. If this is suspected, take them directly to a veterinarian immediately as fleas can lead to myxomatosis – an infection which can prove fatal unless properly treated.
Apple cider vinegar (ACV) can be an effective flea repellent that’s safe for both humans and pets, offering many health benefits in addition to flea-fighting properties. To create an ACV-water flea treatment spray for your rabbit, mix equal parts ACV with water in a clean spray bottle; optionally you could also add essential oils like lemongrass, lavender, neem or geranium drops as additional scenting elements (but make sure it won’t cause allergic reactions!). To avoid risk when doing this step – only mix equal parts ACV with water before spraying on top for effective flea-killing results!
This mixture will not only remove fleas from your rabbit, but it will also ward off ticks, mosquitoes and bed bugs. Reapply this spray at least once every day or before letting your rabbit outside or just before returning them indoors for nap time – either way is fine!
Add apple cider vinegar to their daily water source as another way of giving them an added health boost and helping prevent green algae in their cage. One tablespoon in two gallons should suffice.
Treating your rabbit’s yard and home, as well as their bedding, to prevent flea infestation is essential in protecting them against fleas that lay their eggs in their environment. Consider hiring professional pest control service as they will offer safe yet effective treatments that protect both yards and homes against fleas.
Flea collars can be an effective way to combat flea infestation on rabbits, but you must use one designed specifically for rabbits – and not ones meant for dogs or cats which could contain chemicals which are toxic for the animal. Consult your veterinarian before selecting a collar.
As with using any collar, be sure to monitor it regularly and remove it when fleas are detected on your rabbit. Though this might take more work, the effort will definitely pay off in terms of flea control. Alternatively, bathing could also help provide more effective flea treatment, with baths often ridding a lot of fleas off quickly leaving bunny feeling fresh and clean after their bath experience.
Flea combs feature fine teeth that can catch and remove fleas without harming your rabbit’s fur, so this method should take no longer than other approaches when dealing with fleas on rabbits. Just be sure that any captured fleas are immersed in water or alcohol as soon as they have been captured to effectively drown any remaining ones. It may take more time but is often considered one of the most efficient strategies for eliminating fleas on rabbits.
Flea powders can also be an effective means of ridding your rabbit of fleas. The Sacramento House Rabbit Society recommends using 5 percent carbaryl dust, an insecticide available from pet stores or online. When applying a flea treatment you should always separate your rabbits so they do not lick each other and become sick from this infection.
Flea infestation can be a serious threat for rabbit owners. To effectively combat flea infestation, regular cleaning and vacuuming are crucial in order to ensure there aren’t too many fleas in your home and that those that exist are dead. Furthermore, keep rabbits separated from other animals, treat house pets for fleas regularly as well as keeping any potential flea problems away from other rabbits and visit your veterinarian if any issue arises.
Pancreatitis can be painful, leading to nausea and a lack of appetite in pets. Pet parents should encourage their cats to eat by encouraging their meals at regular intervals.
An organ in a cat’s abdomen located near their stomach and liver, their pancreas produces enzymes to assist digestion as well as hormones which regulate blood sugars. Unfortunately, however, its cause remains unknown, thus treatment generally centers around supportive care rather than cure.
Pancreatitis is a potentially life-threatening condition in cats caused by inflammation of the pancreas releasing digestive enzymes into their small intestines, where they’re activated by small intestinal bacteria. But when they leak from an already inflamed organ like the pancreas, they can begin digesting organ itself while also damaging other parts of their bodies such as liver kidneys or intestines. Therefore it’s wise to avoid food that might upset their pancreas, such as fatty foods.
Vets and experts often recommend a low-fat diet for dogs or people suffering from pancreatitis; this advice does not always apply to cats; excessive dietary fat can aggravate pancreatitis symptoms in some cats; however, this is less frequent among them compared with dogs and humans.
An unhealthy high-fat diet requires the pancreas to work harder to produce insulin and essential enzymes, overstressing this organ and leading to conditions such as pancreatitis or even cholangiohepatitis (an inflammation of liver and biliary system).
Maintain a diet with moderate levels of fat to help your cat avoid future episodes of pancreatitis and other health conditions like obesity. One great food choice for cats suffering from pancreatitis is IAMS Proactive Health Mix, with no more than 8% total fat and prebiotic fiber to promote beneficial gut bacteria as well as being easily digestible for easy nutrient absorption. You can find this food at most pet stores online; for optimal results it should be fed several small meals throughout the day rather than one large one as this will allow them to absorb their nutrients more quickly.
As cats with pancreatitis require frequent meals to remain healthy, it’s crucial that they continue eating even if they do not seem interested. Failure to consume sufficient nutrition puts your cat at risk for hepatic lipidosis – an intestinal disorder in which fat cannot be properly metabolized and accumulates in their liver, disrupting healthy organ functions. Hepatic lipidosis can be life-threatening; to protect their wellbeing ensure your cat follows a low-fat diet and stay on it as best you can.
The pancreas is an abdominal organ that produces digestive enzymes and chemicals to regulate blood sugar or glucose metabolism, including insulin. When this organ becomes inflamed, we refer to this condition as pancreatitis; whether its severity ranges from mild edematous symptoms to severe hemorrhagic conditions it does not discriminate by age, gender or breed – sometimes occurring spontaneously without known trigger.
Humans and dogs both are likely suffering from pancreatitis from eating too many dietary fats; in cats however, diet alone appears to play a much lesser role and other conditions could also be to blame.
If your cat’s appetite has been affected by nausea, anti-nausea medication could help. When taken as directed, the stomach’s response to pain decreases and their appetite returns. Also try trying different types and flavors of food to see which will tempt their appetite; pates or minced/shredded foods in broth/gravy may be more appealing than dry food options; offer high moisture foods to stay hydrated – these strategies should bring their appetite back within two-10 days; if this fails please reach out to veterinary immediately for testing/treatment options or help.
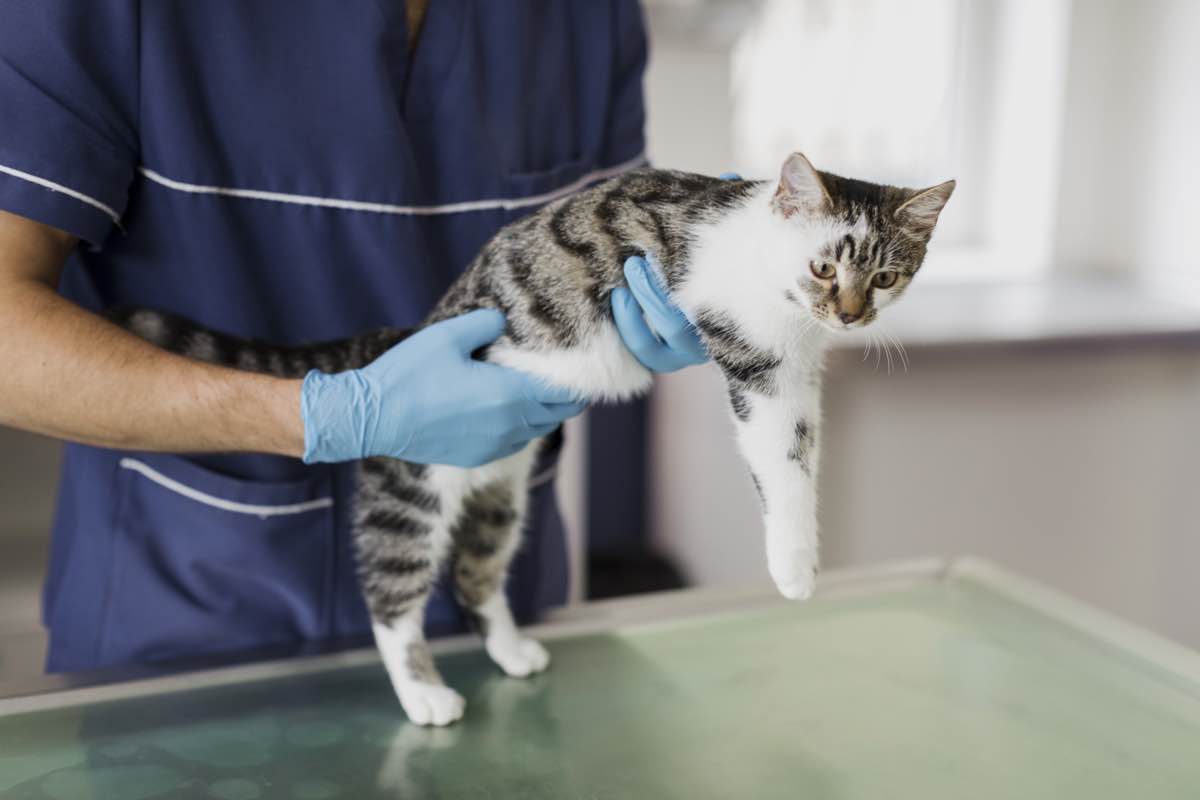
Pancreatitis is an acute condition, and requires both short- and long-term treatments to address it effectively. Shortly, hospitalization will occur while intravenous fluids and pain relievers are administered intravenously to maintain normal hydration and electrolyte balance, while painkillers will help ease intense discomfort. Food may need to be withheld until recovery, though once stable food can gradually reintroduced as per vet advice.
Once your cat has been discharged from hospital, they should be fed small meals to provide them with sufficient calories and nutrients to aid their recovery. As they may have associated the food they were exposed to at hospital with feeling unwell, it’s essential that you offer them delicious yet easy on their stomach foods that encourage eating.
The pancreas is an essential organ situated between the liver and stomach in the abdomen, producing enzymes to aid in digestion as well as hormones to regulate blood sugar. If it becomes inflamed and begins leaking digestive enzymes into the abdomen, this could cause irreparable damage and lead to symptoms like loss of appetite, abdominal pain, fever, dehydration and weight loss.
Chronic pancreatitis in cats can damage cells that produce the digestive enzymes needed for digestion to such an extent that the cells producing enough digestive enzymes are destroyed, leaving cats suffering from exocrine pancreatic insufficiency unable to make enough of these digestive enzymes for digesting their food and leading to diarrhoea. Unfortunately this condition can lead to poor prognoses; however these cats can still be helped with diets low in fat content and daily replacement pancreatic enzyme supplements in their food.
After pancreatitis has struck your cat, the best way to encourage him/her to eat again is with high-protein, low-fat foods that will provide essential hydration. Try offering them in smaller pieces that are easily chewed such as pouch or tray food that has been warmed. Doing this should increase appetite.
Cats suffering from pancreatitis often exhibit discomfort and loss of appetite, making eating vital in terms of providing essential nutrition and hydration. Hospitalization may be required in severe cases or in those suffering bile duct obstruction.
Pancreatitis occurs when an exocrine pancreas becomes inflamed and begins leaking digestive enzymes into surrounding tissues, inflaming surrounding tissues and leading to painful inflammation known as pancreatitis. Under normal circumstances, these digestive enzymes would reach their destination of breaking down food after leaving the stomach – yet when pancreas inflammation occurs, these digestive enzymes seep into adjacent tissue instead triggering painful inflammation known as pancreatitis.
Pancreatitis can lead to other serious health problems in cats, including diabetes mellitus, fatty liver disease and inflammatory bowel disease. Therefore, it’s vitally important that you monitor their behavior or changes after experiencing pancreatitis so you can get them seen by a veterinarian promptly.
No one knows exactly what causes most cases of pancreatitis in cats, but we know obesity and eating human-grade food can increase its risks. By following your veterinarian’s treatment plan and avoiding foods which could trigger it, you can help ensure their long and healthy lives.
If your cat has been diagnosed with pancreatitis, it is vitally important that they continue eating as soon as possible to ensure that treatment can begin in time. Pancreatitis can be fatal without early treatment; acute cases typically show severe symptoms like pain and vomiting which leads to weight loss in cats with acute cases. If these signs appear in your feline companion, take them right away to the veterinarian so they receive proper medical treatment and ensure a speedy recovery process.
The pancreas plays two primary functions; secreting enzymes to aid digestion and producing chemicals to regulate blood sugar levels. If its exocrine pancreas becomes inflamed, this can result in pancreatitis. When its digestive enzymes activate too early and begin digesting its own tissue and other organs such as stomach or small intestine.
Pancreatitis symptoms may include abdominal pain, nausea, vomiting and diarrhea. Your veterinarian will gather medical history information, perform a physical exam and run blood tests that measure amylase and lipase concentrations; additionally an ultrasound of the abdomen may also be conducted to check for inflammation or other changes within the pancreas.
Although pancreatitis may not be entirely preventable, you can help lower their risk by feeding them a diet low in fat and avoiding high-fat table scraps. Furthermore, probiotics and digestive enzyme supplements may be added to their food to promote good digestion and reduce inflammation within their gut.
Dogs occasionally lose their appetite. It’s important to monitor for a loss of appetite that continues for more than 24 hours or is accompanied by symptoms like diarrhea or lethargy.
Some pets require syringe feeding with diluted canned food, under the supervision of a veterinarian. This practice should only be undertaken with their permission and supervision.
If your pup has stopped eating and you are concerned, consult your veterinarian immediately to assess its cause. A lack of appetite could be indicative of serious illness such as intestinal or dental problems; your vet may suggest food changes or other treatments depending on what caused its lack of appetite.
Stress and anxiety are often responsible for an abrupt change in appetite in dogs. It could be anything from new dogs entering your home to travel, separation anxiety and switching over to dry kibble instead of canned food causing issues for them. Once identified as the source, this should help restore their appetite.
Your dog’s lack of appetite could be temporary and resolve on its own. If this has not happened after changing their food and eliminating table scraps and treats, as well as cutting out treats altogether, then speaking with your veterinarian about alternative solutions such as hand-feeding or feeding tubes may be necessary.
Your pup might just not like their food, or find their bowl too challenging or boring to eat from. Try arranging their food differently; adding water or broth, mixing in canned food for more appeal or warming up their food up and doling it out directly from your hand to stimulate hunger.
If your dog exhibits symptoms of anorexia, such as not drinking or walking normally, it’s imperative that they visit a veterinarian immediately. There may be various causes, including heart disease, cancer, gastrointestinal disease, diabetes and parasites; if none can be determined they may prescribe treatment tailored specifically for each pet’s case. It’s also a good idea to contact them if he/she seems dehydrated as this could be contributing to dehydration as well as other potential health concerns.
If your dog has started turning down its daily meal of kibble but eating treats, table scraps, or other food instead, they may have outwitted you. They know if they delay their regular daily meals they can still find more options later – leading them to overeating on inappropriate foods which can have serious health implications. It would be best to stop giving treats altogether so they learn that what’s on their plate is all that will be provided them with. If this has already happened for them then create a regular schedule for feedings so they learn that what’s coming down is all that they will get from you.
Another factor which could cause your dog to refuse food could be anxiety or stress. Changes to routine, the arrival of new people or animals into the household, traveling, loud noises such as construction or thunder, as well as loud environments may all have the power to cause an upheaval and make your pup uneasy – which could result in them forgoing eating altogether. If this occurs try creating a quiet environment in which they can dine on their food – once calm they may resume eating it regularly again!
Failing appetite may also indicate illness in dogs. Vomiting or diarrhea should prompt immediate veterinary visit. They could be dehydrated or suffering from serious medical conditions like cancer, liver disease, pancreatitis, heart disease, intestinal parasites kidney disease or gastrointestinal obstruction that require immediate medical attention.
If a dog is vomiting or experiencing diarrhea and refuses to eat, they should see their veterinarian immediately. If they’re not dehydrated, something such as chicken broth or baby food that’s soft and easy for them to chew may help encourage eating again. Dogs shouldn’t go more than 24 hours without eating or drinking even if they are vomiting; though in these instances they usually can survive several days without food/water without becoming dehydrated; sooner treatment by a vet means greater chances of recovery.

One effective solution to helping a dog who won’t eat is hand-feeding. This technique is especially useful with fearful dogs because it teaches them to associate you with food and treats, increasing confidence. Furthermore, hand-feeding prevents too rapid of an eating spree which may present potential choking hazards.
Utilizing a closed fist when hand-feeding your dog can help them develop impulse control. Start off with small amounts of kibble to gain their focus before slowly opening your fist and allowing them to eat the meal – any attempts by them at taking the food away should result in closing it back up again! This will teach them not to try to mug you for it before being allowed access.
If your dog suddenly stops eating regularly and seems sickly, schedule an appointment with their veterinarian immediately so they can assess and devise a treatment plan.
Some dogs stop eating because of fearful environments like loud vacuum cleaners or washing machines. Other issues, like separation anxiety or the desire for human companionship can also inhibit appetites; in these instances, your vet may prescribe medication that encourages eating again.
Your dog may have acquired a taste for certain types of foods and is refusing to eat his/her regular meals anymore; in this instance, it would be worthwhile trying different brands of food to see if any are suitable.
Some dogs prefer eating from their bowl rather than your hands because this allows them to more accurately control how much food they eat. If that is the case for your pup, try placing their bowl in an eye-catching location or adding toppings such as Parmesan cheese or chopped fresh herbs for added appeal.
Veterinarians may recommend syringe feeding in certain instances to maintain your pet’s health, which includes dogs, cats, birds and small animals such as rabbits and guinea pigs. Syringe feeding should only be done for short periods, since it can be challenging to deliver sufficient calories this way to sustain a healthy animal; your vet will advise which syringe feed product to use and how often.
Syringe feeding is often employed when newborn babies can no longer breastfeed for various reasons, including not producing sufficient milk due to conditions like mastitis or not latching properly with their infant. Other reasons could include premature delivery, poor primitive reflexes or birth defects such as cleft palate or lip.
As soon as a medical or dental issue has been addressed, dogs who don’t eat can usually recover. However, if your pet acts lethargic or exhibits diarrhea symptoms you should contact a veterinarian immediately as this could indicate serious illness.
Depending on their anxiety or stress levels, your pet may be losing appetite due to anxiety or stress. To help them relax in their new environment and encourage eating again. Try offering food in a quiet area without distraction. Providing it in this manner should help them adjust more easily while giving them time to get used to eating in an unfamiliar place.
Dogs that have been recently adopted or rehomed may take time to adjust to their new environment and find their appetite again. While it is natural for rehomed or adopted dogs to be wary about eating when separated from their pack or family, getting them to consume food again after being housed at a shelter might prove more difficult.
As you hand-feed, be sure to use a clean syringe each time and only give small portions at one time to reduce bacteria and fungus build-up. Although a finicky pet may need time before they start eating again independently again after being hand-fed by you, with patience and persistence they will likely find their own eating rhythm again eventually.
Shelties or Shetland Sheepdogs are such a praiseworthy dog breed. Much like every other breed out there because, let’s face it, all dogs are adorable, lovable creatures. And that’s precisely why we care for them so much.
But Shelties, in particular, are very smart, playful, affectionate, loyal, and highly energetic too. After all, herding dogs are like that.
To be honest, if your pet dog, no matter the breed, is active as a result of you making sure that he/she receives his daily dose of both mental and physical stimulation (along with loads of love and attention), then any dog can be ALL of those things Shelties are.
So back to Shelties, and speaking of caring for dogs, what health problems do Shelties have? That way, you can be prepared for looking after them by ensuring frequent vet visits and health check-ups.
Now before we get into the main topic of discussion, let’s get to know a little more about this beautiful dog breed.

Gentle, curious, and intelligent – the best way to describe the Shetland. They may look like Rough Collies because of their miniature size, but there are a few differences between them. The Sheepdog is agile with a small-sized, long body that’s proportionate to his/her height.
Since they’re herding dogs, their gait imparts a good amount of endurance, speed, and agility.
What about Shelties’ coat? You’re dealing with a double-coated breed here. Their fur consists of a long, rough, straight outer coat (moisture and rain repellent) while the undercoat is short, soft, and dense (for keeping the dog comfy in warm and cold climates).
Moving on to the frill, mane, and tail, these have a lot of hair. In fact, male Shelties have a mane that grows to quite an impressive size. And the color of Shetland Sheepdog fur is either blue merle or sable. The former includes black, gray, and white while the latter is a combination of light and dark brown with a little bit of white.
And lastly, what’s their size? As short as 12” or as tall as 16” – both ways, Shelties are small dogs.

Human company is thoroughly enjoyed and cherished by Shelties, which you can feel yourself when they reward or repay you with affection and loyalty. The breed, even though playful, is very gentle, well-behaved, and amiable when trained properly. And this is just what you want to hear when you have children at home.
Although Shelties that have grown old might not be comfortable around and with children if they’re not grown up in an environment like that. So, in such scenarios, keep active kids away from senior Shelties to prevent any unintentional or unexpected defensive behavior on the part of the dog.
But, more often than not, this particular dog breed is very reserved and timid, mainly toward strangers. They only speak when spoken to or when it’s absolutely necessary. So no unnecessary or excessive barking. Although Shelties’ barking seems to make the breed excellent watchdogs.
Overall, they’re incredibly bright and sensitive with the nature to please, which is exactly what makes them obedient and quick learners. So you can expect Shelties to protect your family and remain loyal to you.

Here are some common medical issues that Shelties or the Shetland Sheepdog breed is more prone to developing…
When hip joints form improperly, arthritis becomes unavoidable. And this can even apply to elbows in Shelties, which shows itself in the form of limping in the front legs or difficulty in getting up.
Dog obesity is a huge problem indeed. And the worst part is that obesity often leads causing other problems. Such as heart disease, arthritis, etc. So it’s very, very important to know how much to feed your dog.
This particular medical condition is primarily caused due to genetic factors associated with abnormal eye development. Eye screening tests are the best way to check if your Sheltie pup has or is likely to get the disease.
An extremely common problem, especially among older dogs and cats. Keep a check on your pet’s lenses – if they’re becoming more and more opaque (cloudy in appearance rather than clear), the dog may lose his/her vision.
Hemophilia, a bleeding disorder, is also another medical condition Shelties are more susceptible to developing. And, needless to say, it’s best to follow the guidance and instructions of a vet in order to diagnose and treat the condition.
Did you know that 80-percent of dogs, irrespective of their breed, are likely to develop a chronic dental problem? Shetland Sheepdogs even more so, quite unfortunately.
The disease involves the build-up of tartar on your dog’s teeth, which leads to infections in the roots and gums if not treated properly or quickly. Worst-case scenarios include your pet losing all his/her teeth. Along with increased chances of damage in the joints, heart, liver, and kidneys.
Dental diseases shorten the lifespan of dogs by 1-3 years. So all the more reason to keep those teeth clean!
When tear glands don’t produce adequate tears for keeping the eyes moist, inevitable infections and sores start to form (called KCS or keratoconjunctivitis sicca).
Symptoms? Dry eye, squinting, thick discharge, pawing at the eye.
The collapse into the scrotum of both or just one testicle of male Shelties at birth is a condition referred to as cryptorchidism. Meaning the testicle or testicles remain inside the abdomen. And this, naturally, gives rise to problems later in life.
More particularly, hypothyroidism is a common health issue for Shetland Sheepdogs. The condition arises as a result of not enough production of the thyroid hormone.
Symptoms of hypothyroidism in dogs include the loss of hair, weight gain, dry coat/skin, mental and/or physical dullness, aggression, skin diseases, excessive sleeping, or other unusual behavioral changes.
Shelties live a happier, healthier life as house pets rather than living outside enduring the fluctuating temperature settings. Their thick double coat requires brushing once every alternate day, with weekly shampoo sessions.
As for the temperament of the breed, Shetland Sheepdogs are highly energetic. This means active training in the form of daily exercise is a must. Otherwise, any dog tends to become very nervous, anxious, and agitated.
And most importantly, potential health concerns must be checked frequently. So don’t ditch regular vet visits for the sake of your pet’s health and overall well-being.